Doodle Boy (Doodle function in detail)
1. Before you start
- The Doodle functions and programs described in this article are based on version 006, make sure both your hardware and software environments are version 006 or above.
- Open mBlock5, add CyberPi to the library, select Extension, and add Display+ extension.
- See Operation Guide of the "Display +" Extension for CyberPi for more details.
2. What is Doodle
Doodle is a feature of the **Display+ **extension that emulates turtle graphics in Python. It is like drawing on paper with a pen. In mBlock5, we can use the Doodle blocks to control stroke weight, coordinates, and other parameters to display personalized patterns on CyberPi.
3. Getting started
3.1 Start doodling
3.1.1 Add Display+
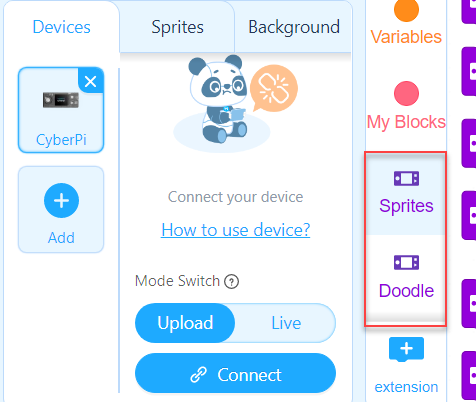
Add CyperPi to the device library and add the "Display+" extension, then you can see the Sprites and Doodle categories as shown below. Connect CyberPi to the computer and you can start programming.
 Note: Doodle can only be used in Upload mode
3.1.2. Practice with example
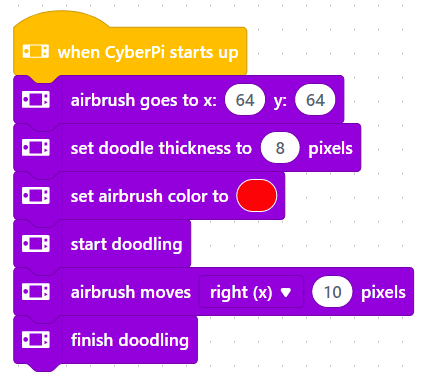
To start doodling after adding the event block, you must also add the Start doodling block. Before you start, you can set the thickness, color, and starting position of the brush. Only moving the brush creates a path, while rotating leaves no trace on the display. After you finish drawing the pattern, you need to add the Finish doodling block to end the program.
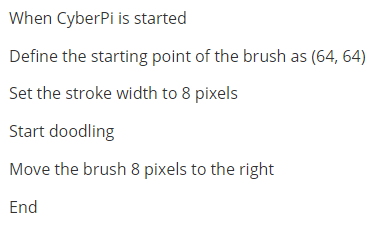
Now let's see how to draw a line on the display.
Pseudocode
Blocks
3.1.3 Upload the program
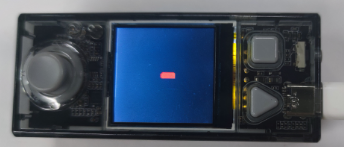
Upload the program to the connected device and you can display the doodle on the display.
3.2 Use the airbrush
The airbrush is very important in Doodle blocks. It works like a brush to draw patterns on the display. You can use the Doodle blocks in mBlock5 to move, rotate and position the brush, and you can use functions and variables to create more complex graphic patterns.
Airbrush functions
You can use the blocks to adjust the direction and coordinates of the airbrush and to set the number of pixels it moves. To draw graphics with Doodle, you need to use the airbrush blocks.
Airbrush blocks
| Function | Blocks | Description |
|---|---|---|
| Color | 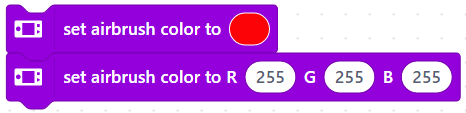 | You can set the airbrush color in one of the two ways: |
- Select color through the color palette.
- Set the RGB values, 0-255, i.e. from zero light to maximum light. |
| Linear motion |
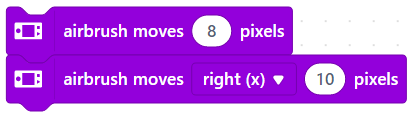 |
|
The airbrush moves in pixels to draw a straight line. The direction defaults to the right.
|
| Rotational motion |  |
You can set the radius and angle to draw different sized circles or arcs.
|
You can set the radius and angle to draw different sized circles or arcs.
|
| Angle of rotation | 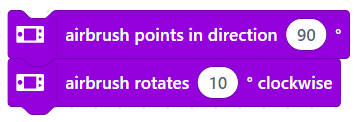 | You can adjust the angle of the airbrush in one of the two ways:
- Click the input box to reveal the dial and drag the arrow to adjust the angle. Here the airbrush points in direction 90°, parallel to the positive direction of the X-axis.
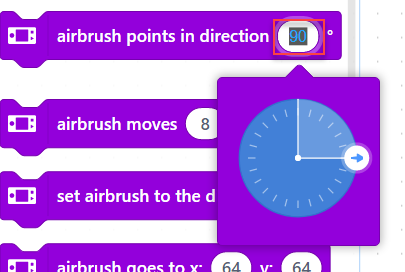
- Enter a specified degree by which the airbrush rotates clockwise. The airbrush arrow faces right by default and changes after each time of angle adjustment. The angle direction you see is the one after the last adjustment. |
| Positioning |
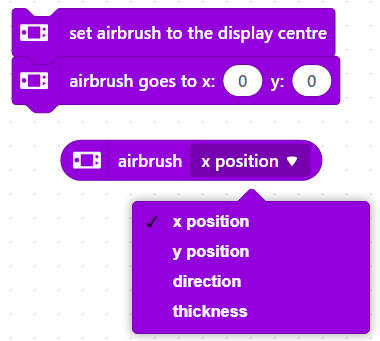 | You can set the starting point of the airbrush in one of the three ways:
 - Set it to the display center
- Move it to the specified coordinates. Here (0,0) is on the vertex of the 90-degree angle in the upper-left edge of the display.
- Adjust the parameters. |
4. Block help
If you have any questions while using the block, you can right-click on the block and select Help in the menu.
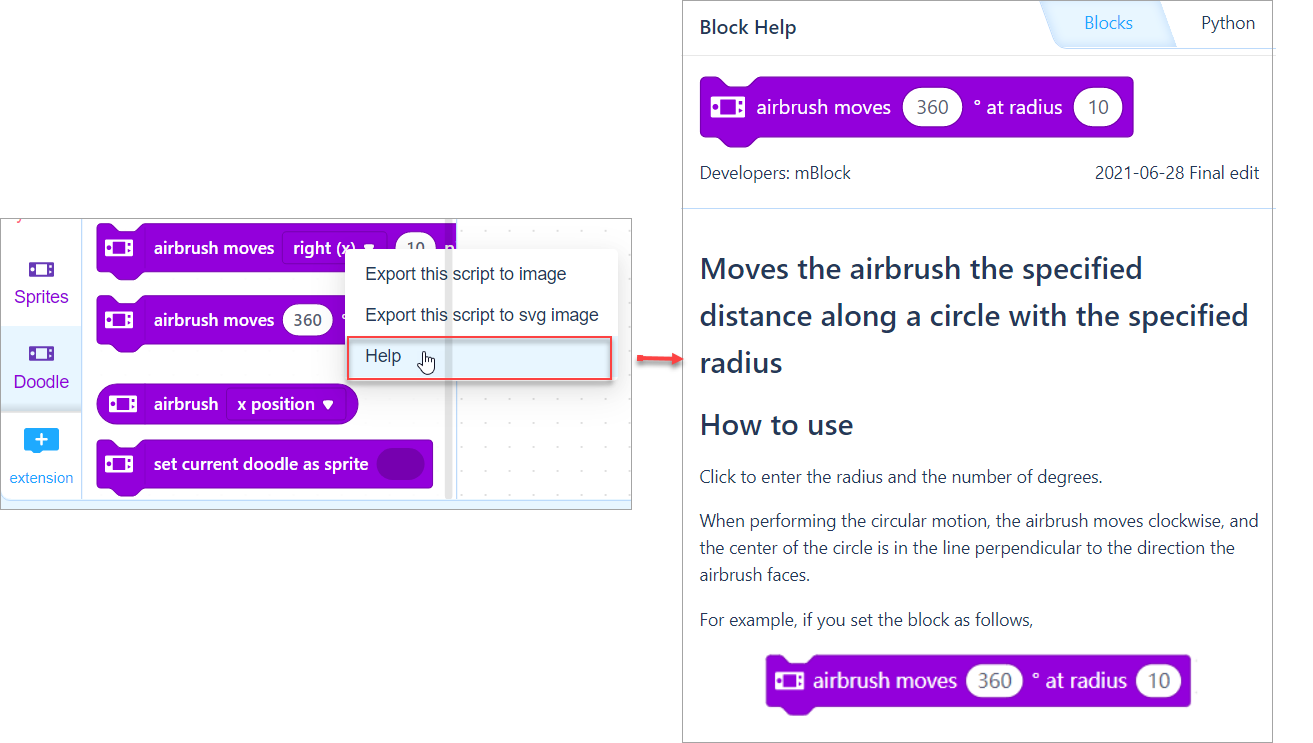 Alternatively, you can look at Block Help for Display+.